Reflection on how we have created a video lesson using Camtasia
 Teaching and learning have become effective in this modern world of technology. We have created a video tutorial using Camtasia. I used Camtasia Studio to capture computer screen, live video screens and shots.
Definition of Camtasia studio
Software used for creating a video tutorial is known as Camtasia studio. This software provides lots of opportunities such as recording video, inserting images, sounds to make the lesson effective.
Camtasia studio is used in creating a video lesson
Camtasia studio is used in creating a video lesson
Steps to create Camtasia studio
1. Start with a great plan
The tutorial videos creating begins with great planning. I considered my audience while creating a video lesson and choose a tutorial topic that would best help my target group. I had my video tutorial on "Light through different medium" from class six Science.
Step 2. Prepare a power point presentation
I used words of everyday conversations to give a smooth, natural feel in my video tutorial. Practiced reading and explaining the lesson, planned on the power point again and again till it flows smoothly. Read the script aloud to make sure it flows smoothly. Got some feedback and accepted my errors to change for good.
Step 3. Record the audio narration
I chose dinning room as a quiet place to record my audio when everybody went to sleep. When I was recording the script, I make sure to speak slowly and clearly. When I made a mistake, I simply pause and start again carefully. I removed mistakes when all my recordings are finished using camtasia studio.
Processes
Processes
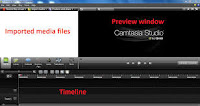
1. Double click on the Camtasia icon. (Welcome Camtasia dialogue box will appear
2. Click on the 'Close' button to continue.
2. Click on the 'Close' button to continue.
How to insert images
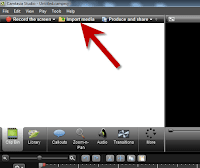
- Click on the 'Import media'.
- Browse the image from the destination source.
- Select the particular image that you want to insert.
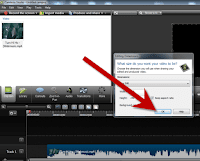
- Click on open button. (the image will appear in the clipboard)
- Drag the image to 'show timeline'.

How to insert a video clip
- Click on 'Import media' under 'Add' menu.
- Browse the video clip from the destination source.
- Select the particular video clip that you want to insert.
- Click on open button.
- Drag the video clip to show timeline.
How to insert audio
- Choose or select import media.
- Browse the audio clip/sound from the destination source.
- Select the particular audio that you want to insert.
- Click on open button.
- Drag the audio clip to show timeline.
- Make adjustment of audio to the image using drag arrow.
How to insert text
- Click on Title clips.
- Type title name (depend on what video you are creating).
- In the text area, you can type the detail of the video to be created (example; states of matter, properties, etc)
- Change the background colour, text colour & fonts.
- Then click the “OK” button.
- Drag a text to show timeline or storyboard

We can also add a transition to make the video flow smooth.
How to insert transition
- In the edit menu, choose or select transitions option.
- Then select any transition effects to the images or video.
- Drag the transition effect to the small square box (for Camtasia Studio 6)
- Drag the transition effect in between the images or videos, where you want the transition. (Camtasia Studio 8)
How to record PowerPoint slides
- Click on record the screen in Camtasia.
- Open the PowerPoint and keep on 'slide show' mode to record the screen.
- Then click on Camtasia Recorder.
- Narrate if you want to along with the slide show.
- Click on the stop button to save the file.
- Click on save and edit button.
- Save as video file .avi files.

- Click Produce Video As or Press Ctrl +P.
- Choose a custom production setting.
- Click next button.
- Select WMV-windows Media Video.
- Camtasia studio best quality and file size(recommended).
- Then next button, again next button, Next button.
- Type the Production name for Camtasia studio.
- Save the video file to the desktop using the browser button.
- Click on Finish button. (The video will be published)


